|
> Users Guide
> Knowledge Base
|
|
Scheduled Sending
When you create a new message you have the option to schedule sending.
You set your mail to be sent after clicking on “Preview Message.”
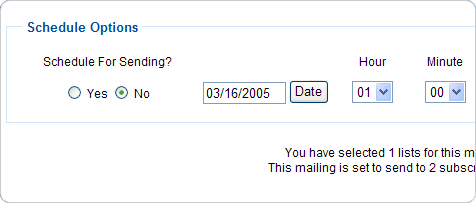
Schedule your mail to arrived at a specified date and time. Select
“Yes” under “Schedule For Sending”
and type in the date (ie:use the scroll down menus to specify the
year, month, day, hour and minute your message is to be sent. Click
on “Send Now” and a confirmation screen tells you that
your message is now in the scheduled to queue.
To view your scheduled mailing, go to “Scheduled
Mailings.” Your queued message appears on the screen. You
have the option to send your mailing immediately by clicking on
“Force Send Now” or to remove it by clicking “Delete.”
|
|